Preparation and Printing
You will need
15 ml (1 tablespoon) of soda ash or sodium bicarbonate.
Small container to mix your ink colours
Measuring spoons
Squeegee or plastic ruler
A screen
Tape, we recommend either masking tape, packing tape, or paper tape
A small container of water
Rag for cleaning

1 - Scouring
*If you have our printing kit skip this step
Pre-wash your fabric or garment with PH neutral soap or baby shampoo. Rinse well. Boil water, and add to a wash a tub. (e.g For 1 cotton t-shirt we use ~4L boiled water). Add in 7.5 ml or ~1/2 Tbsp of Soda Ash, stir to dissolve.
Place in fabric or garment into tub, allow to soak for several hours.
If you only small pieces of fabric or garments you can reduce the amount of water and soda ash and scour in a pot on your stovetop.

2 - Prep Screen for test print:
Cut a small shape in paper and tape to the back of your screen to test the ink color and practice printing. Put the stencil onto the back of the screen face down and turn the screen over to make sure the stencil is applied on the right side. The acetate or paper should be flat with as little airspace as possible between the screen and the stencil.

3 - Prepare indigo
*When the ink base is mixed with indigo powder it will solidify after some time. Only mix the amount of ink you will print with that day.
Use a teaspoon to scoop out your chosen amount of indigo powder from the jar. Put this into a small, dry container. With the back of a spoon crush any clumps and try to grind the powder as thinly as possible.
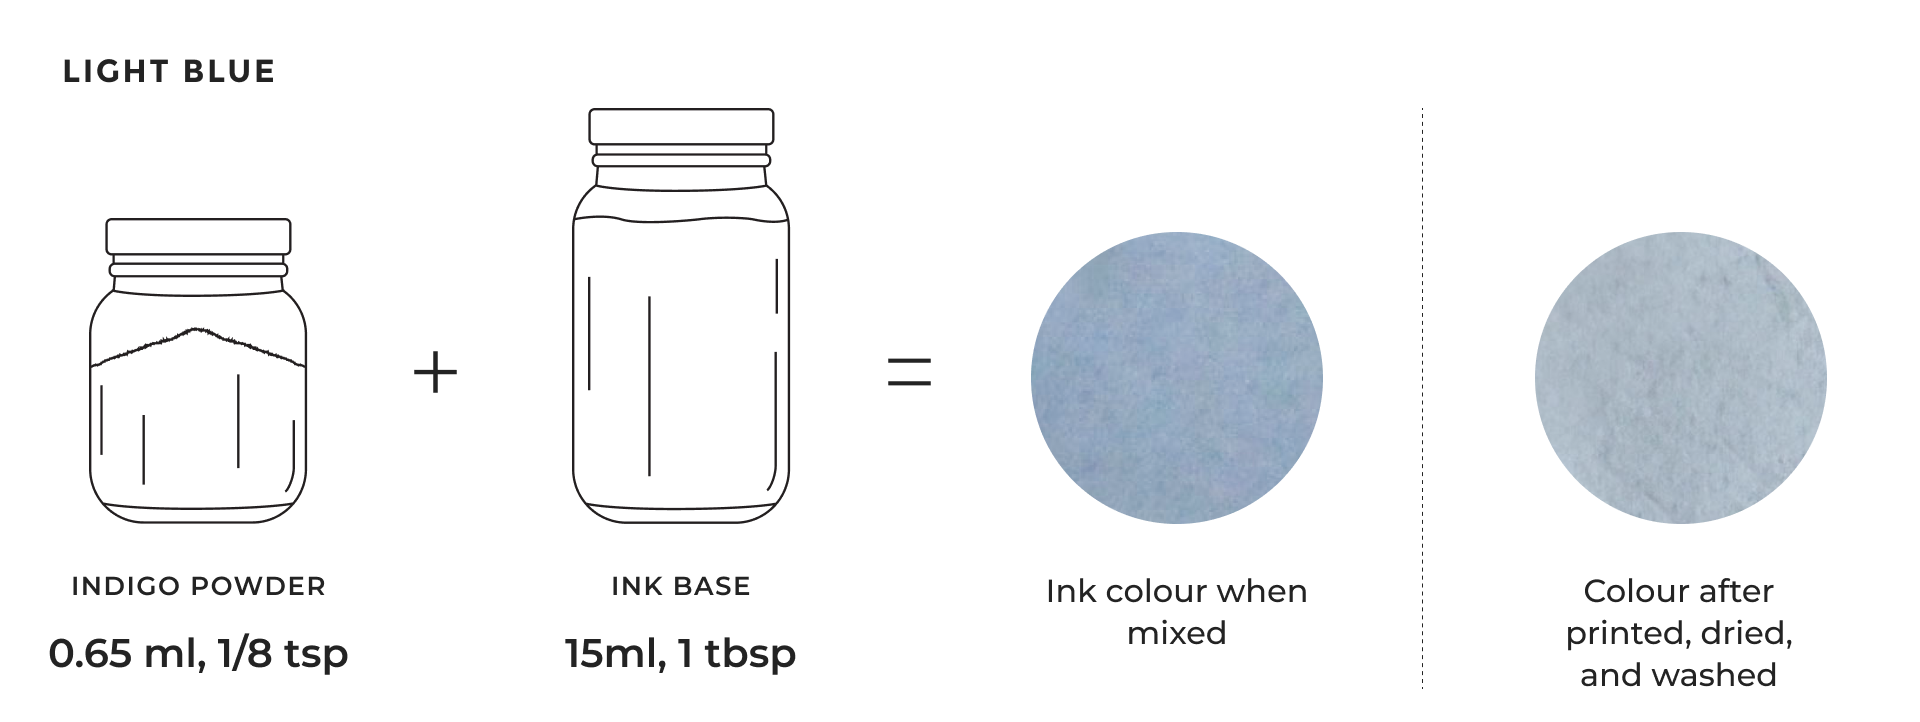

4 - Mix your ink
Shake and stir the white base well. Pour 15 ml (1 tablespoon) into the container with the crushed indigo powder. Stir until the color is uniform and there is a smooth consistency. The ink will look a bit lighter than the printed shade.
5 - How to screen print
Place a cutting mat or cardboard beneath your fabric. For t-shirts and tote bags put this inside so the ink doesn’t leak through.
Put the screen face down on top of the fabric.
Apply a small amount of indigo above the top of the design, make sure it covers the width of the design.
Hold down the sides of the screen to make sure there is not too much of a gap between the mesh and the printing surface.
Using your squeegee pull the ink across the design. To pull, use a bit of pressure and pull across at a medium speed. With our ink we go over the design 2-3 times.
If your design bleeds, you may have put too much ink on the screen. If some of the design does not show up, you may need more ink or to make sure the ink is evenly spread to cover the entire width of the design.
6 - Colour Test
Create a test print to check your colours, using your prepared screen with the small shape and included fabric swatch.
Colours will dry slightly lighter than when wet.
Make any adjustments to the colours you have mixed.
When you’re happy with the colour and feel confident with your printing, remove the test print stencil. Wipe the screen with a wet rag until clean and dry before applying your final stencil design.
Some printing techniques you may want to try:
Gradient
Colour overlaying
7 - Test print your finished Design
If you’re feeling confident you can go to step 8, otherwise test print your final design and experiment with different techniques on fabric or art paper. Note how much ink you have applied.
8 - Print your design
Place a cutting mat or cardboard beneath your fabric. For t-shirts and tote bags put this inside so the ink doesn’t leak through.
Print your design.
Wipe the screen with a damp cloth after each time you print to make sure there isn’t any residue blocking the design.

9 - Finishing up
Cleaning:
Avoid allowing the ink to dry on the screen by wiping the screen with a damp rag when you are not using it. Wipe your squeegee also in between pulls.
When you’re finished printing remove the stencil (and clean if you used acetate). You can re-use your stencil for your next project.
Wash the screen with water. Spray with a hose to remove any excess ink, or wash gently with a damp rag.
Aftercare:
Air dry for 8+ hours in the shade before washing. Hand-wash with soap nut or mild soap like baby shampoo. Do not tumble dry or boil. Iron reverse side only.